 OK - moving right along before I start blushing. For fun placemats (and 6 matching napkins, if you desire), you'll need the following:
1/2 yard each of SIX (6) coordinating/contrasting prints
(Mine are from Heather Bailey's Pop Garden line for Free Spirit Fabrics. Yum-o.)
About 3 yards of heavy weight interfacing (I used sew in, but fuseable would be great, too.)
(A note about the interfacing, I had intended to use canvas as interlining until I found the stiff stuff in my stash, so canvas would probably work, too - just depends on how "stiff" you like your placemats - I like mine fairly stiff. If you like 'em soft you could even use quilt batting.)
Coordinating thread and sewing supplies, especially a rotary cutter, quilter's ruler & mat. 1. iron all your pieces - I don't prewash. I'm not a prewasher. If you like to prewash, please do. I won't hold it against you if you don't hold my non-prewashing against me. Then, from each print, cut a 15 x 18 rectangle. (I wanted my placemats to be square-ish, so that's the reason they are this size. Any size from this up to 18 x 22ish will be fine if you like them more rectangular.)


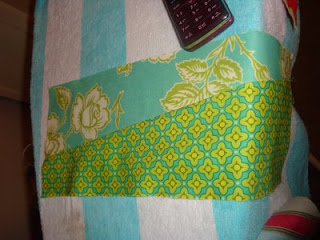
3. This step is the fun part. "Shuffle" the pieces, (see above photo) so that you have one of each print on each of the 6 layers. Be careful - you MAY even want to label the pieces 1-6 on the back or with a water soluble marker. I risked it, but I had one (out of 6) that I didn't sew together in the right order (1 to 2, 2 to 3, etc.)...and I had to rip out and start over.


7. With a 3/8" seam (you could use a 1/4" if you wanted...I just like that 3/8" gives me more wiggle room if my big rectangles don't match. I hate cutting...have I mentioned this?) - sew all the way around, turning at the corners with the needle down, leaving the 4" open for turning.

12. While pressing the edges, turn under the flap where you left the opening for turning & press well. Use a pin or two to hold it closed.


13. Edge stitch all the way around the placemats, closing the opening, and turning at the corners. I did a second row of stitching just inside the first row of edge stitching, purely because I like how two rows looks.

14. Then, I stitched "in the ditch" along the seams where the top is pieced. (This is optional - and would be fun if you decided to stitch in a different pattern, or in a zig-zag stitch or blanket stitch along those seams...) VOILA! Placemat divine.


wow. You are talented. If I knew or cared what interfacing, fuseable anything, interlining, or a turning tool were...well then. You and I would be clones and twins born a decade apart is good for me.
ReplyDelete